If you’re interested in making your PDFs accessible, then you may have heard the term “tagging your document.” Tagging is essentially wrapping the elements in your document with specific HTML tags that tell Acrobat what the item is. If you’re exporting from Microsoft Word, you have the option to auto-tag a document in the PDF export tool. However, auto-tagging often mixes things up or breaks things apart in unideal ways. I recommend manually tagging your documents to ensure accuracy.
We’ll discuss a little bit of tagging in this episode. Tagging is, in this humble blogger’s opinion, the most overwhelming and tedious part of the PDF accessibility process. We’ll be covering this part last in our series. In the meantime, this Overview of the PDF tags article is a helpful guide that will help shed some light on PDF tags.
Episode list
- Ep. 1: Intro and Series Overview (the basics)
- Ep. 2: Using the Accessibility Check Tool
- Ep 3: Reflow and Reading Order
- Ep 4: Document Tagging
- Ep 5: Conclusion
Helpful Adobe references
Definitions list
- Acrobat – referring to the full program Adobe Acrobat Pro DC
- PDF – Portable Document Format
- SEO – Search Engine Optimization
- Ctrl+4 – Toggle reflow view
Document reflow and reading order
To get a good idea of why reading order is so important, let’s first talk about reflow. The term “reflow” has many different uses and definitions. In the case of PDF reflow, it is taking all of the content from a PDF and shifting it into a single column. It also removes backgrounds, decorations, and artifacts from a document which allows a user to just read the content of a PDF.
Proper document reflow relies on an intentional reading order. In all likelihood, an automatically generated reading order will have issues or will not present the information the way you wanted it to be ordered. Reflowing a document is easy and togglable, so we encourage you to toggle this function many times throughout your PDF accessibility remediation process. You can do this by selecting View from the primary toolbar, navigating to Zoom, and selecting “Reflow” from the Zoom child menu (or by pressing ctrl+4 on your keyboard). This will reflow your document so you can see how well (or poorly) things have been automatically ordered without a manual reading order established. You can’t edit your document when you’re in reflow mode so this will just be a view mode. Viewing your document in reflow mode will also give you a better idea of how to design and tag your document. For example, if you’re using white text on a colored background, reflow will remove that background color if it has been tagged as an artifact (rendering the white text unreadable in reflow). Just some things to keep in mind!
Establishing a reading order
Reading order is exactly what it sounds like – the order in which content on a page is programmatically determined. However, more often than not, an automatically generated reading order has been assumed incorrectly and your document isn’t being read in the order it should be (either in Reflow mode or by a screen reader). So it’s best to manually ensure a reader order is correct. There are a couple ways to do this.
Creating a reading order from the ground up
One way to establish reading order is to start from the ground up, clear all existing page structures, and manually establish the reading order while tagging the document using the “Reading Order” tool in the Accessibility tool pane. The benefit of this is knowing exactly what every item in a PDF is tagged as because you’re the one manually creating the tags and reading order. Even when creating a manual reading order, you will still likely have to make some manual adjustments to the reading order.
To get started, select “Reading Order” from the bottom of the Accessibility tool pane (or press ctrl+shift+U). This will open up a dialogue box. If your PDF has existing tags, they will become highlighted and have numbers next to the outlines boxes.
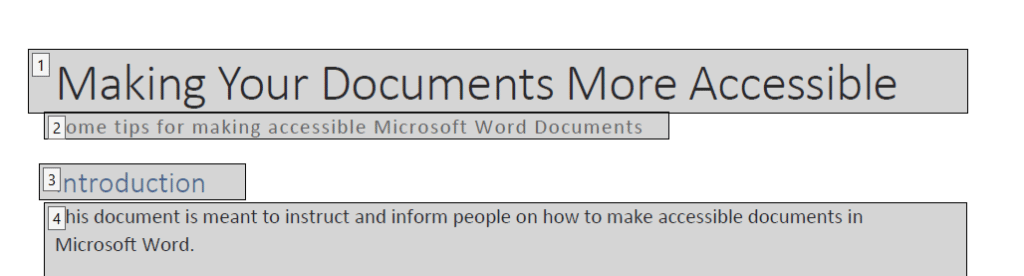
The numbers represent the order in which assistive technology will read a document and reset at the top of each page. You can modify these tags or even clear the page structure and completely start over.
To begin tagging, use your mouse to draw a rectangle around the first item in your document. Once you’ve drawn a rectangle, the tag buttons in the Reading Order dialogue box will become active. This process does not have keyboard shortcuts.
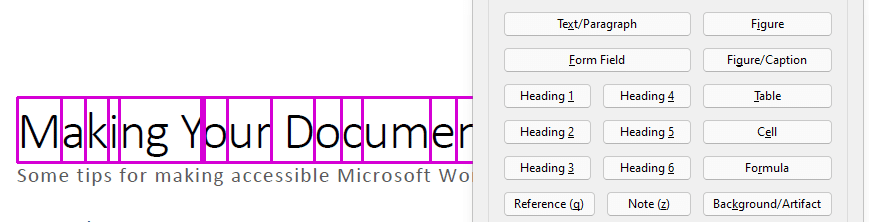
In a standard text document, this will probably be your Heading 1 (H1), the title of the document. You should have no more and no less than one of these in a document. When you’ve decided on your tag, click the corresponding option. Adobe provides a full explanation of what each option is for in their Reading Order tool help article, which I highly recommend reading over for a more detailed explanation on tagging.
When you’re done tagging all of the elements in your document, go ahead and reflow it to see how everything has fallen. It is not uncommon for an element or two to have switched from the order you selected for it. You will have to modify these items manually using the Order pane which is available on the left-hand Navigation pane which can be navigated to by pressing F6 on your keyboard and tabbing to the “Order” tool. Unfortunately, there is not a keyboard command for manually reordering the reading order.
Sighted users will want to select the icon depicted in the following image:
Using your mouse, drag and drop the items you want to re-order to their desired position.
Remediating an automatically generated reading order
You can automatically generate a reading order by selecting “Autotag Document” from the Accessibility tool pane. This will automatically tag and order your document. These tags will, in all likelihood, be incorrect (such as mislabelling a heading level or not detecting an image). We will cover correcting these tags in a future episode of this series.
Some documents will have a more intuitive reading order than others. For example, while a standard Word document may seem to have a more straightforward structure, we actually find documents that have been exported from another Adobe program, like Illustrator, tend to be more accurate. We assume this could be due to some sort of back-end translation Adobe has as a relationship between their programs (or it could just be a coincidence).
After running the auto tag function, return to the Order tool pane and begin manually checking for your reading order by ensuring the numbered boxes listed on the page are in the order you want them to be. You can use your mouse to manually drag and drop them into the correct order in the Order pane. The automatically generated reading order may group text together in larger chunks that make it more difficult to reorder. If you have a page with a lot of little bits on it that are impossible to re-order correctly as is, you will probably want to press ctrl+shift+U to bring up the Reading Order dialogue box, clear the page’s structure, and manually order and tag this page.
Concluding episode 3
Reading order is incredibly important to a document’s accessibility. Otherwise, your document could read like a story with the ending first.
Congratulations on making it this far in the series! Unfortunately, the hardest part is yet to come. Next episode, we’ll be discussing document tagging. See you there!
Our Accessibility Maintenance Plans help you remove barriers for people with disabilities and meet legal requirements with confidence.