If your website is required to be accessible, that also extends to the PDFs you may host there for your users to download. There are several benefits to this which you can read about in our previous Accessible PDFs: Everything You Need To Know post. In a series of posts, we’re going to now go over in detail PDF accessibility in Adobe Acrobat, how to prepare for it, how to check for it, and how to fix it.
This series will go beyond simple document accessibility and also touch on more complex PDFs, like infographics (fear not, your beautiful infographic can potentially be made accessible). As you may or may not know, hiring a service to make your PDFs accessible can be pretty expensive. While this post will tell you how to do it yourself, it will also shed light on why it can be expensive to outsource (and why that price can be worth it).
So welcome to Episode One: The Basics!
Episode list
- Ep. 1: Intro and Series Overview (the basics)
- Ep. 2: Using the Accessibility Check Tool
- Ep 3: Reflow and Reading Order
- Ep 4: Document Tagging
- Ep 5: Conclusion
Helpful Adobe references
Definitions list
- Acrobat – referring to the full program Adobe Acrobat Pro DC
- PDF – Portable Document Format
- SEO – Search Engine Optimization
- Ctrl+4 – Toggle reflow view
An overview of making PDFs accessible in Adobe Acrobat Pro DC
In order to make a PDF accessible in Adobe Acrobat Pro DC (to be referred to as simply “Acrobat”), we’ll be using a few tools Acrobat has included in its software.
If you’re dealing with a standard document that was exported from a word processor as a PDF, a lot of the heavy lifting will have been done for you if you created the original document with best practices in mind (heading nesting, correctly formatted, proper tables, etc). However, if your original document wasn’t created with best practice in mind or we’re dealing with a complex document that may have been exported from something other than a word processor (like an infographic or a brochure), you could be in for a bit of a lengthy manual tagging process. Form PDFs are a different animal entirely, so we won’t be going through that process in this post (but maybe sometime in the future).
Some quick notes about this series
- The instructions provided in this series will primarily revolve around the assumption you are using Acrobat’s default settings. We will be giving instructions that are visual but also providing keyboard shortcuts (when available) and alternative methods of accessing features within Acrobat. However, if you’ve implemented custom keybindings, heavily modified preferences, or are using mods or add-ons, some of our instructions may not be accurate for you.
- These instructions were created using the Windows operating system. Mac keyboard shortcuts will be provided when available; however, we’re unsure of any interface differences there may be in Acrobat between the two operating systems.
- Keyboard instructions will be provided when available. Unfortunately, not every function we’re going to cover is accessible via keyboard.
Formatting document properties
If you’re working with a standard word processing documentation and addressed these properties there, they will likely carry over. However, if the PDF didn’t come from a word processor or the options were not set in the original document, your PDF’s properties will likely be blank. It’s important to set these properties for the sake of clarity, organization, and findability.
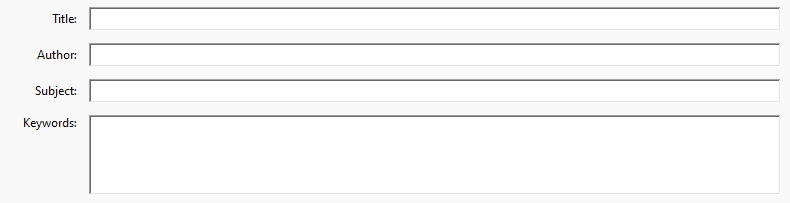
Right-click anywhere on your PDF and click “Document Properties” from the drop-down (or press Ctrl+D on your keyboard). A dialogue box will automatically open focused on the “Description” tab. While there are several property tabs available, we’re just going to focus on the “Description” tab for now. Within the “Description” tab, there are four input fields available: Title, Author, Subject, and Keywords. These fields play an important role in identifying your document and making it findable within a person’s saved documents – think of it as SEO for your documents.
Title
Sometimes, file names aren’t completely indicative of what the file is (and sometimes that’s out of necessity to keep it short). By setting a descriptive title, you still allow your users to search for it within their documents. It will also provide this title in browser tabs instead of the file name. So, instead of something like “beef-tacos-v3-11202018.pdf,” tabs will display “The Best Recipe for Homemade Ground Beef Tacos.”
Author
While establishing an author doesn’t have an accessibility benefit per se, it does identify where the document came from which can be helpful to many of your users. For example, if you’re a dog groomer who put out an unbranded PDF with awesome at-home tips for grooming your dog, you could set your Authorship to be the name of your grooming salon which could increase traffic to your website for more helpful tips.
Subject
Just like setting a subject for an email, this describes the point of the document. The words in the subject line also become searchable when a user is searching for the PDF of their machine so make sure they’re relevant!
Keywords
Filling out the keywords is your opportunity to make sure your PDF can be found again, even if the user who has a copy of it can only remember a few things about it. You do still want these keywords to be relevant to the document or it will show up in any vague search (which could be annoying). Referring back to our taco recipe example, keywords for this could be: taco, beef, chili, dinner, mexican food, cumin, easy meal, cheese… Now I’m hungry… you get the idea. If a PDF’s author has set appropriate keywords, they make their documents much more accessible (even when it’s not actually open).
When you’re done filling in these fields, click or Tab to “OK” to save the settings. I’d also recommend saving your document after this by clicking File > Save in the toolbar, or by pressing Ctrl+S on your keyboard.
Document language
It’s also important to establish your document is set as the correct language. Assistive technologies depend on the set language of a document for pronunciations and translations. Most of the time, a document’s language will default to whatever the document creator has their computer’s default language set as. In some cases, however, this should be double-checked. For example, if a bi-lingual user is creating a document in Spanish but has English set as the default language of their computer, then the Spanish document will likely be set to English.
To check and modify a document’s language, open your Document Properties again and navigate to the “Advanced” tab. Under “Reading Options” towards the bottom, there will be a language drop-down. Ensure this is set to the primary language of the document.
Document passage language
In cases of a paragraph, phrase, or portion of the PDF being a different language than the bulk of the document, this can be modified independently in the Tags pane after a document has had tags implemented (which we will discuss later in this series). In this case, simply navigate to the parts in question in the Tags pane, right-click and select Properties.
Keyboard instructions: This can be done via keyboard by pressing F6 until you’re within the left-hand “Navigation” pane, use the down arrow key until you’re focused on Tags, press Enter to activate the Tag pane and tab to focus into the pane. Then use your up and down arrow keys to navigate to the tag whose language you wish to modify (you can use your right and left arrow keys to expand tags groups to reach child items). When you’ve reached that tag, press tab twice to activate the item’s drop-down and use your arrow keys to navigate to Properties.
The language drop-down is available in the tag’s properties and everything within that tag will now be semantically identified as that language as opposed to the document’s primary language.
PDF Security
Notice: We do not recommend implementing PDF passwords unless absolutely necessary. Doing this can restrict access to assistive technologies and make your PDF completely unreadable for some people.
It’s not uncommon to want to protect your files from being edited by third parties. And Acrobat makes it easy to add password protection to PDFs in the Document Properties under the Security tab. However, when implementing password security, make sure the checkbox for “Enable text access for screen reader device for the visually impaired” is checked.

Some quick bonus advice
- DO keep accessibility in mind when creating your original document. Use correct heading hierarchy, format your lists properly, give your tables headers, and so on (here’s a Microsoft article on making Word documents accessible – this information can apply to most other word processors). Creating an accessible original document will make creating an accessible PDF a bit easier.
- DO NOT use scanned PDFs. Scanned PDFs are not accessible at all to screen readers and their text can’t be resized. They strain the eyes because they’re always a few degrees off and your readers have to read at a slant. Scanned documents should either be re-typed or re-exported if the document is still available. Some PDF software can convert a scanned document and output real text (which should then be edited).
- DO give your files descriptive names. It is much easier to decipher the contents of a file named “annual-report-2022” or “Ground-Beef-Tacos-v2” than it is to decipher “Untitled24” or “FinalDraft-copy-3.”
And that concludes the basics!
With all this in place, we’re ready to start making our PDFs accessible. We decided to make this a series because a deep dive into PDF accessibility is much more than a one-post subject. So in an effort to make the information more digestible, we decided to break it into bite-sized “episodes” over the course of a few weeks. Throughout the series, we will be covering using the accessibility checker, document reflow, reading order, tagging, and more! Our hope is this will be an informative series our readers can use to make their documents more accessible for all.
Our Accessibility Maintenance Plans help you remove barriers for people with disabilities and meet legal requirements with confidence.